PAC Machine Edition Software: Ensure the correct version of PAC Machine Edition software is installed and licensed on the programming computer.
Ethernet Cable: A standard Ethernet cable suitable for the network environment.
IP Address: The IP address of the GE RX3i Rackless CPU, e.g., 192.168.X.X. The factory-loaded IP address for initial connection to a GE RX3i CPE305 CPU is 192.168.0.100.
Power On: Ensure the RX3i Rackless CPU is powered on. Check for the green “CPU OK” LED indicator, which confirms the CPU has passed diagnostics and is functioning correctly.
Cable Connection: Connect one end of the Ethernet cable to the Ethernet port on the RX3i Rackless CPU or the local ICS switch if there is one and the other end to the network adapter of the programming computer.
Network Configuration: Ensure the programming computer's Ethernet adapter is configured with an appropriate IP address within the same subnet as the RX3i Rackless CPU, if applicable. If it is an initial connection with the factory default IP address, ensure no conflict occurs in the network with the temporary IP address.
Launch PAC Machine Edition: Open the PAC Machine Edition software on the programming computer.
Create New Project:
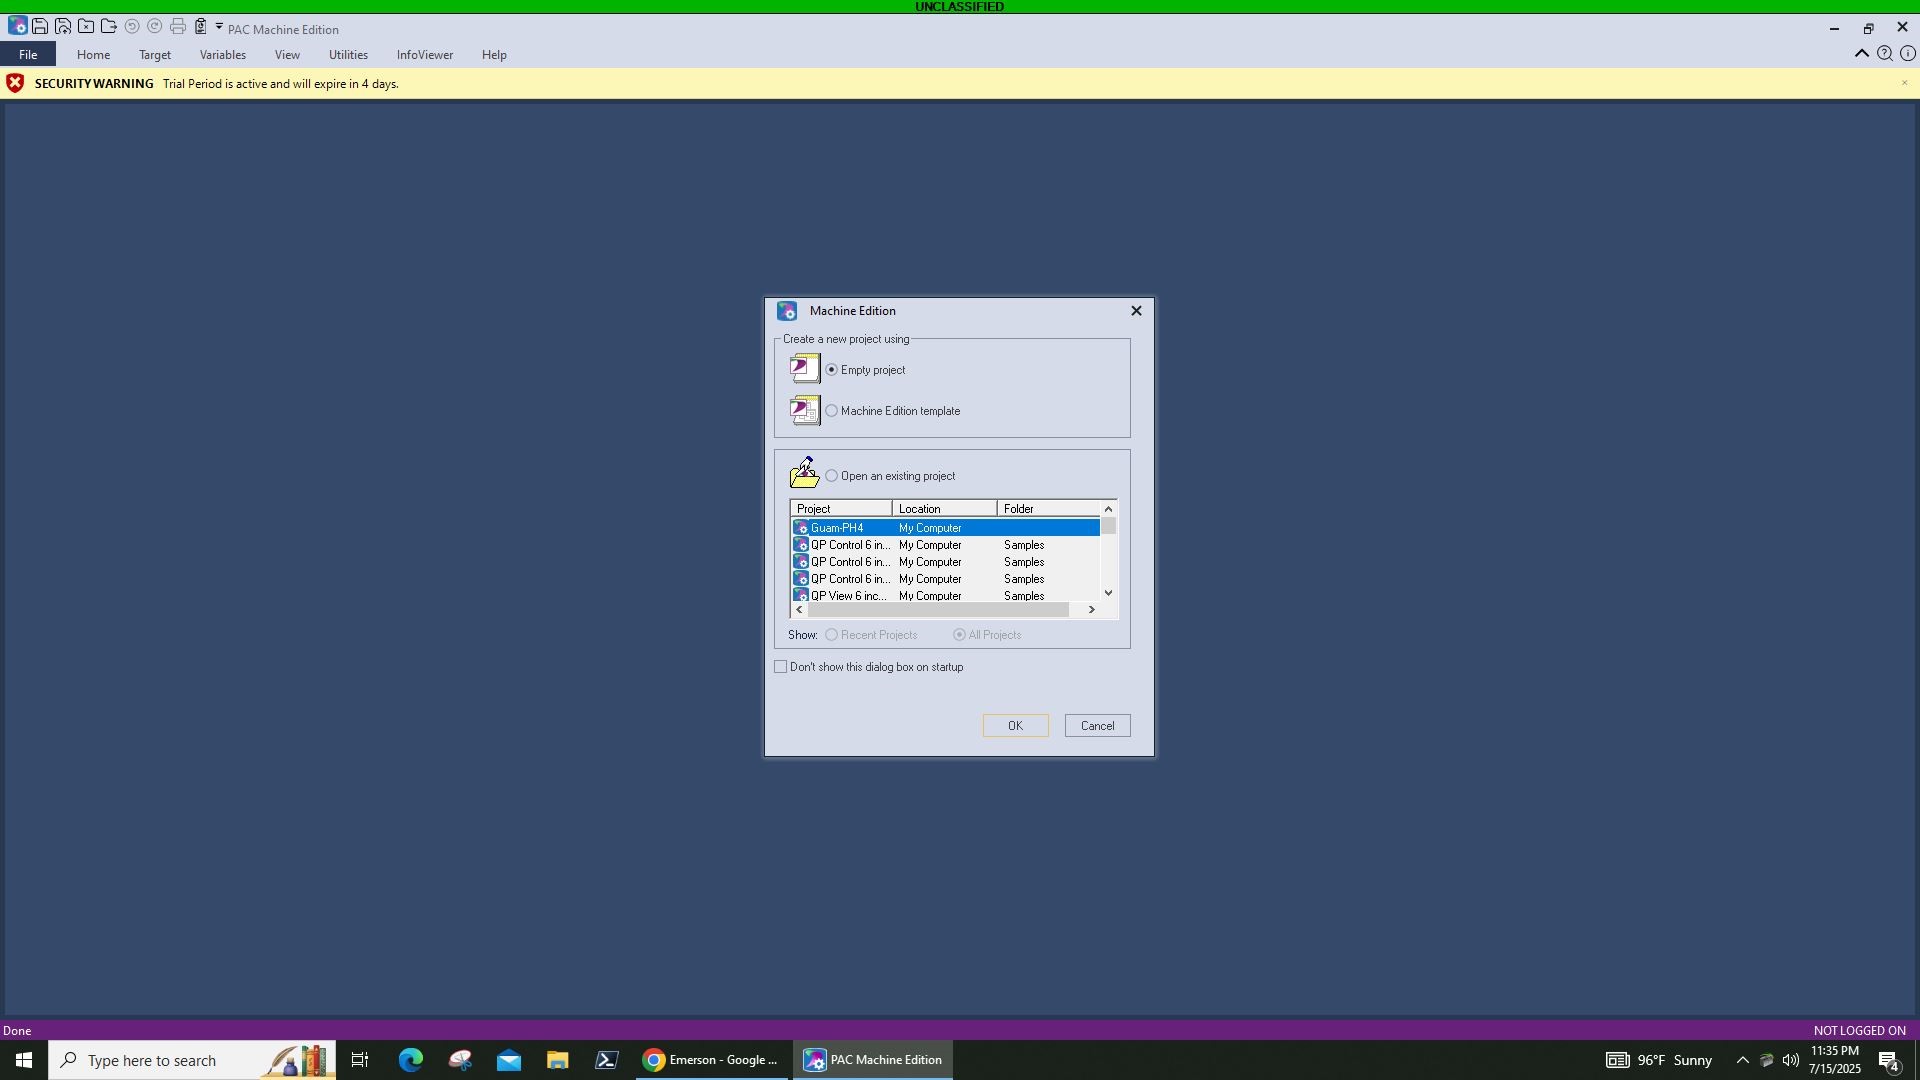
Click on File -> Create a new project using -> Empty Project.
Click OK.
Define Project Details:
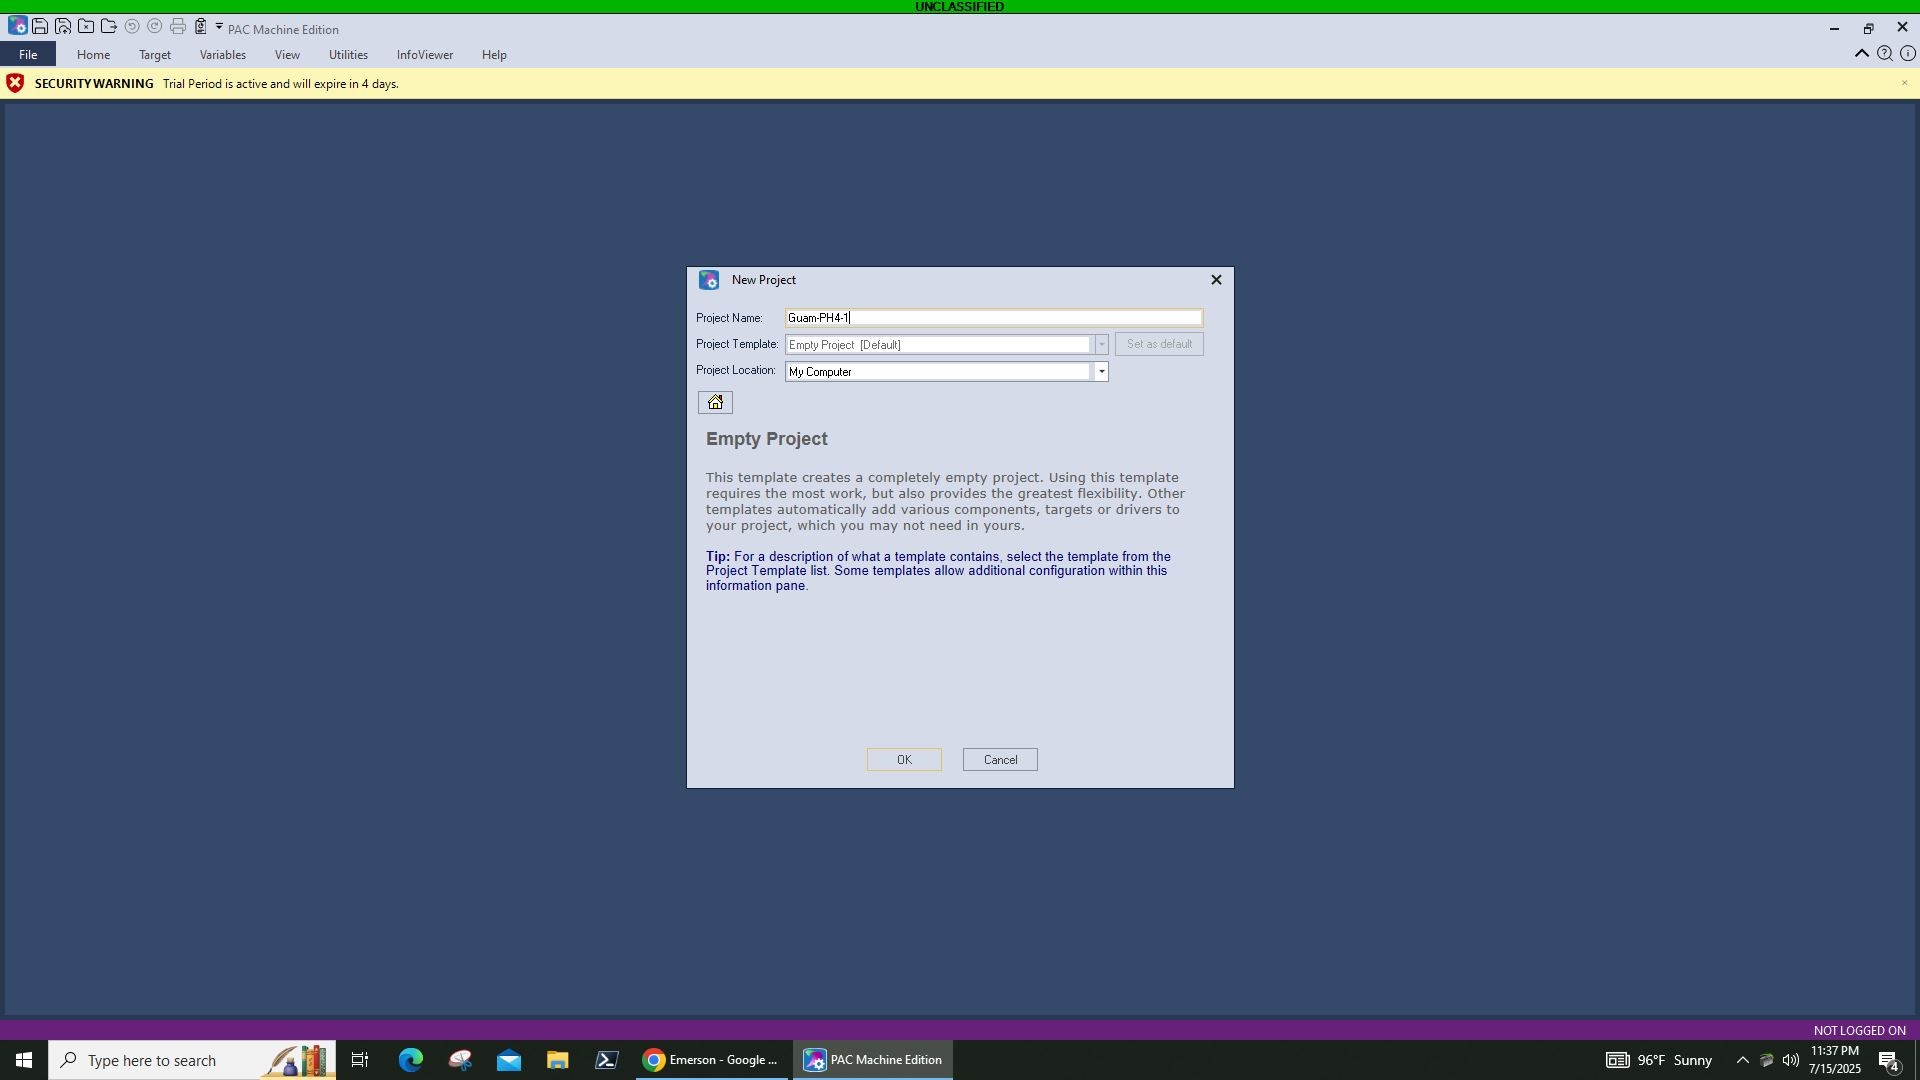
Project Name: Enter a descriptive name for the project (e.g., <Site-Loc-#>, like Guam-PH5-1 or Guam-PH5-2). Note that if the PLCs are set up in High Availability (HA), you will need to create a separate project for each PLC.
Project Template: Confirm Empty Project [Default] is selected.
Project Location: Choose the desired location to save the project.
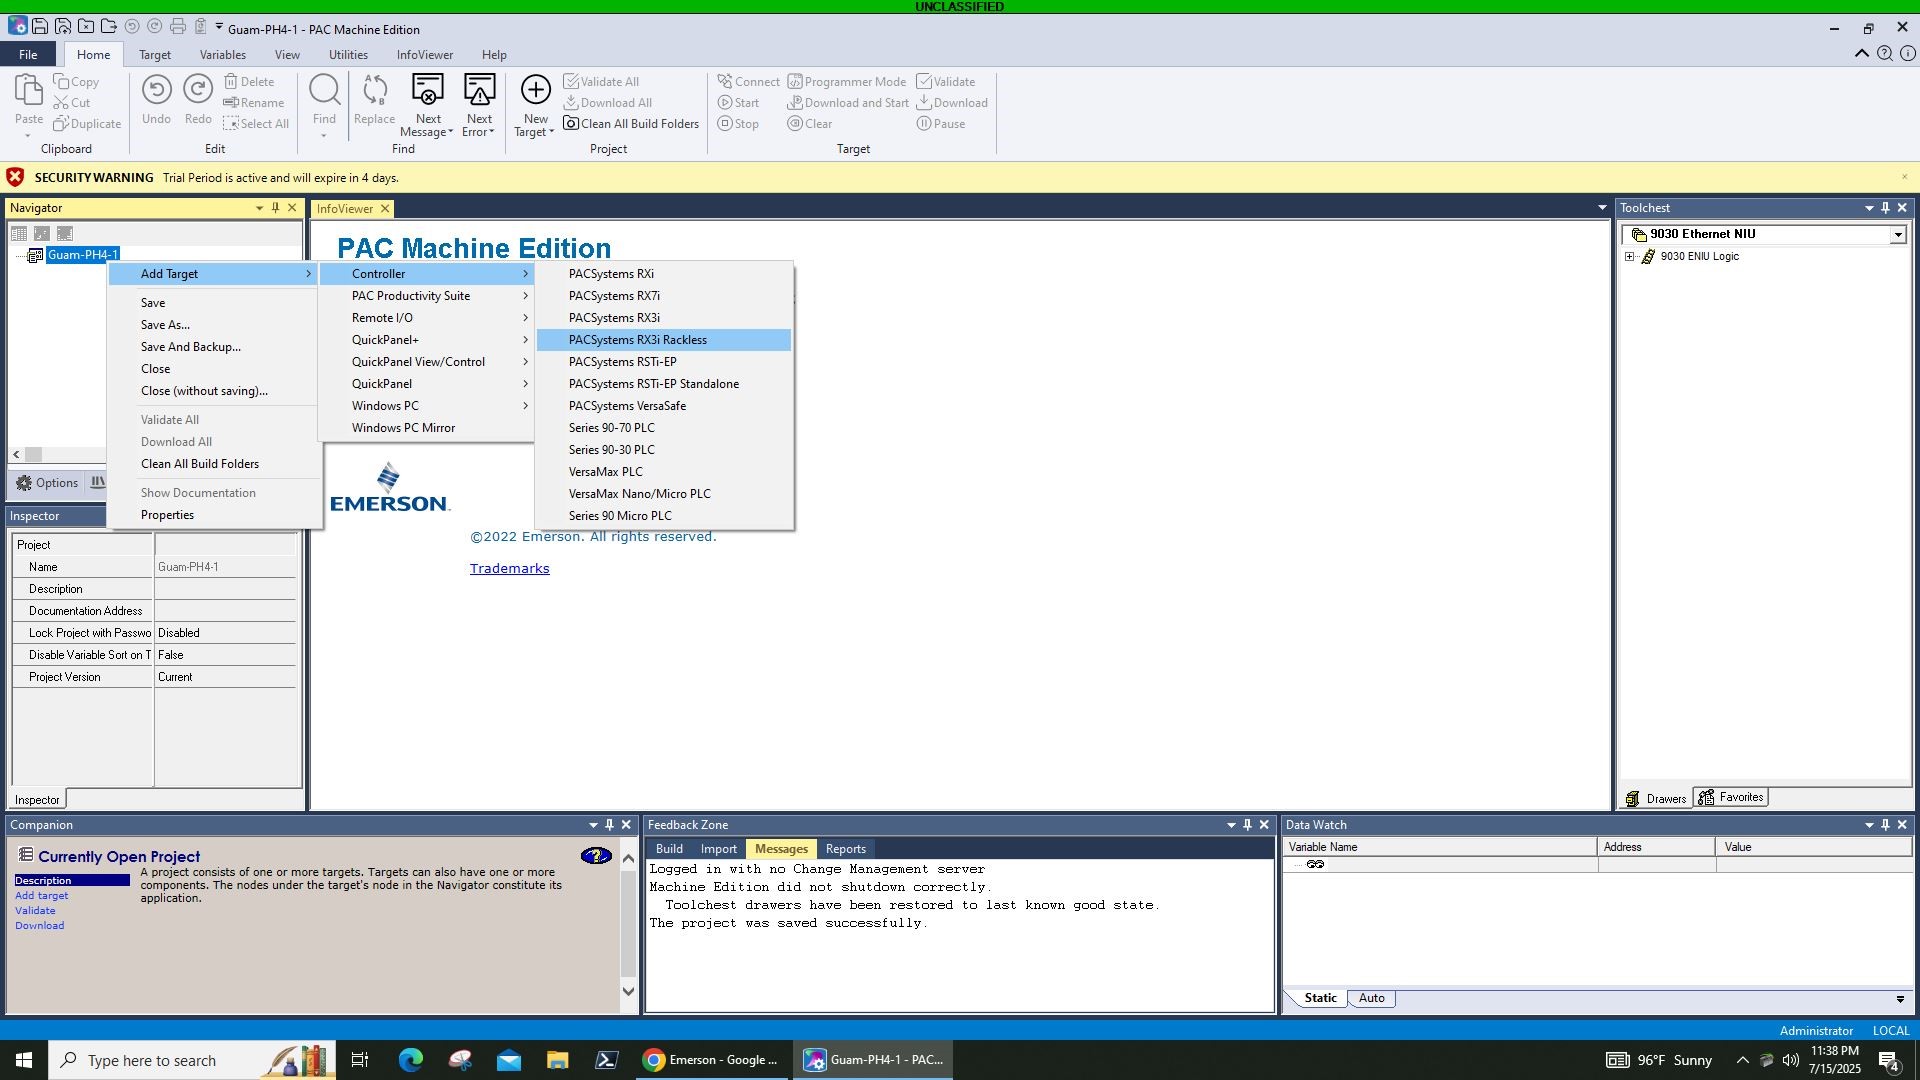
Add Target: On the left side of the screen, within the Navigator panel, right-click on the project name. Select Add Target -> Controller -> PACSystems RX3i Rackless.
Configure IP Address:
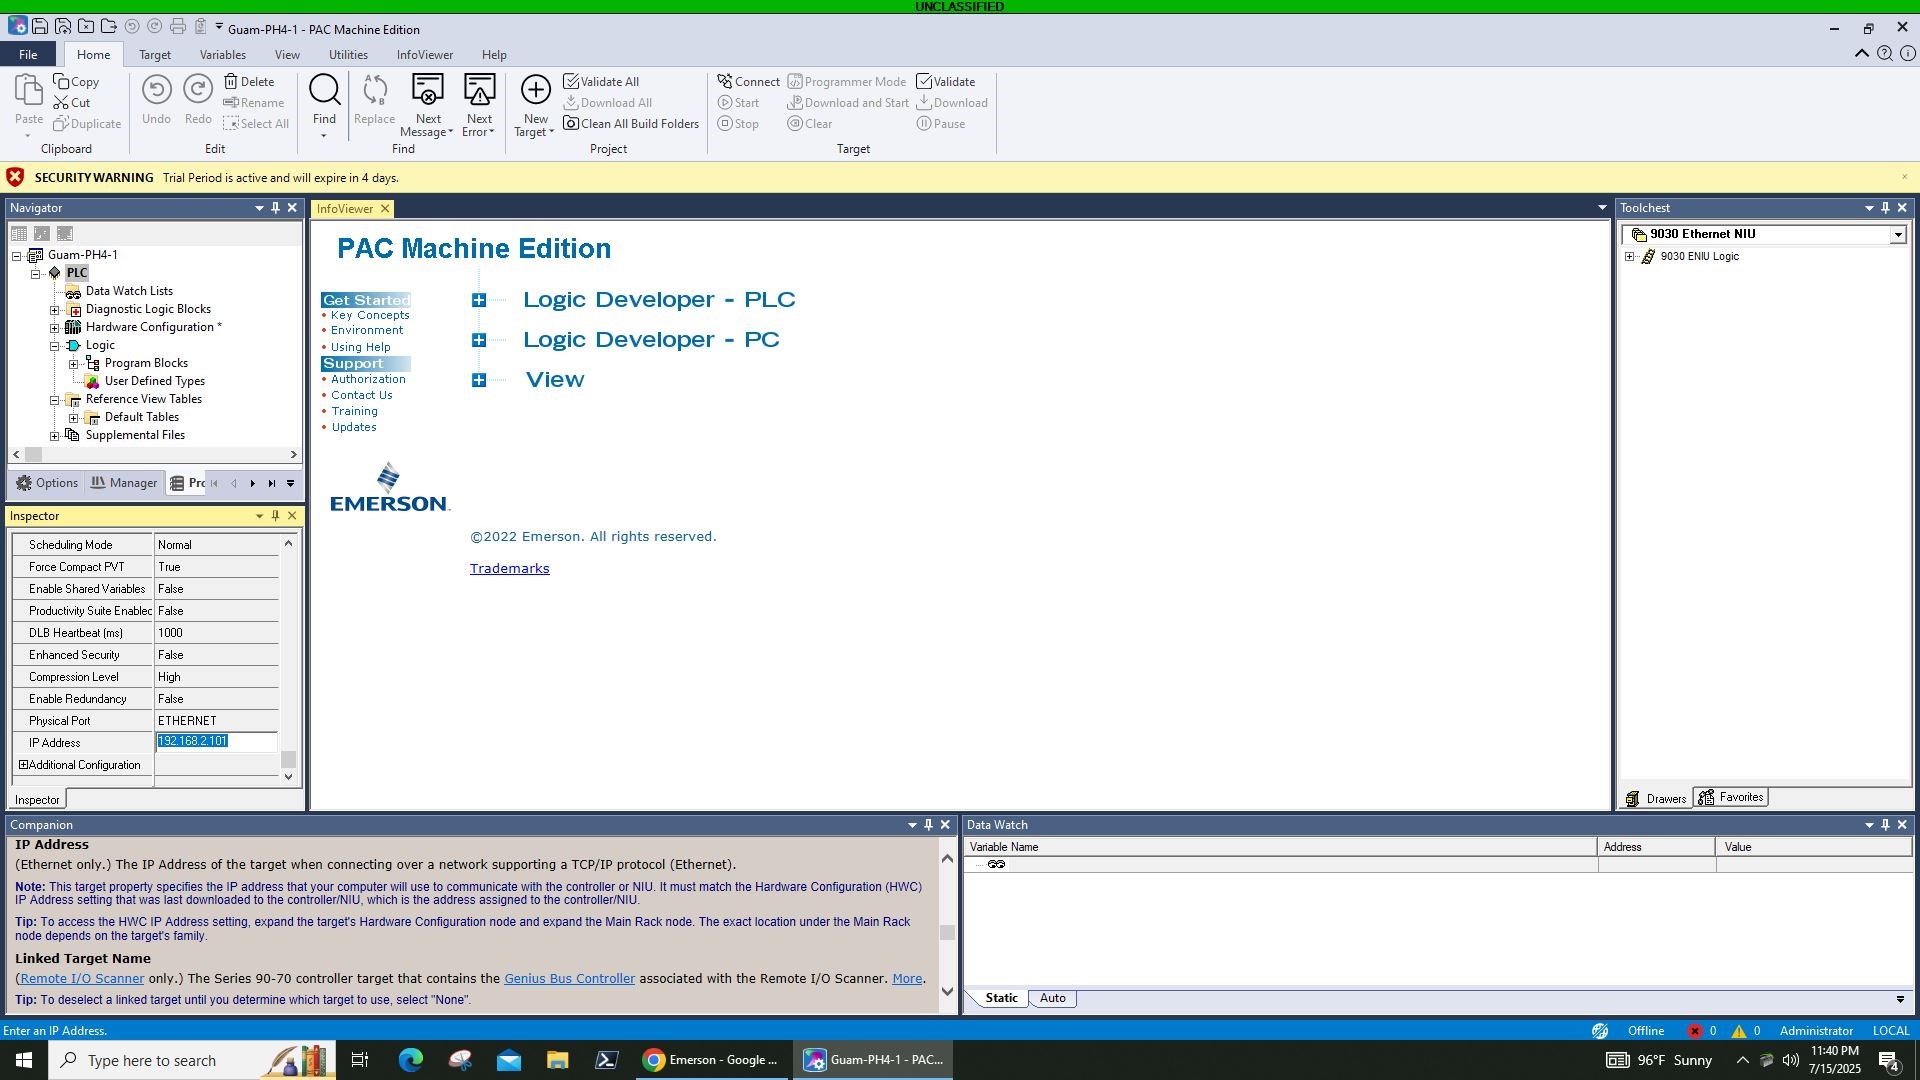
Under the project hierarchy, locate and click on the newly added PLC target (e.g., "Guam-PH5-1").
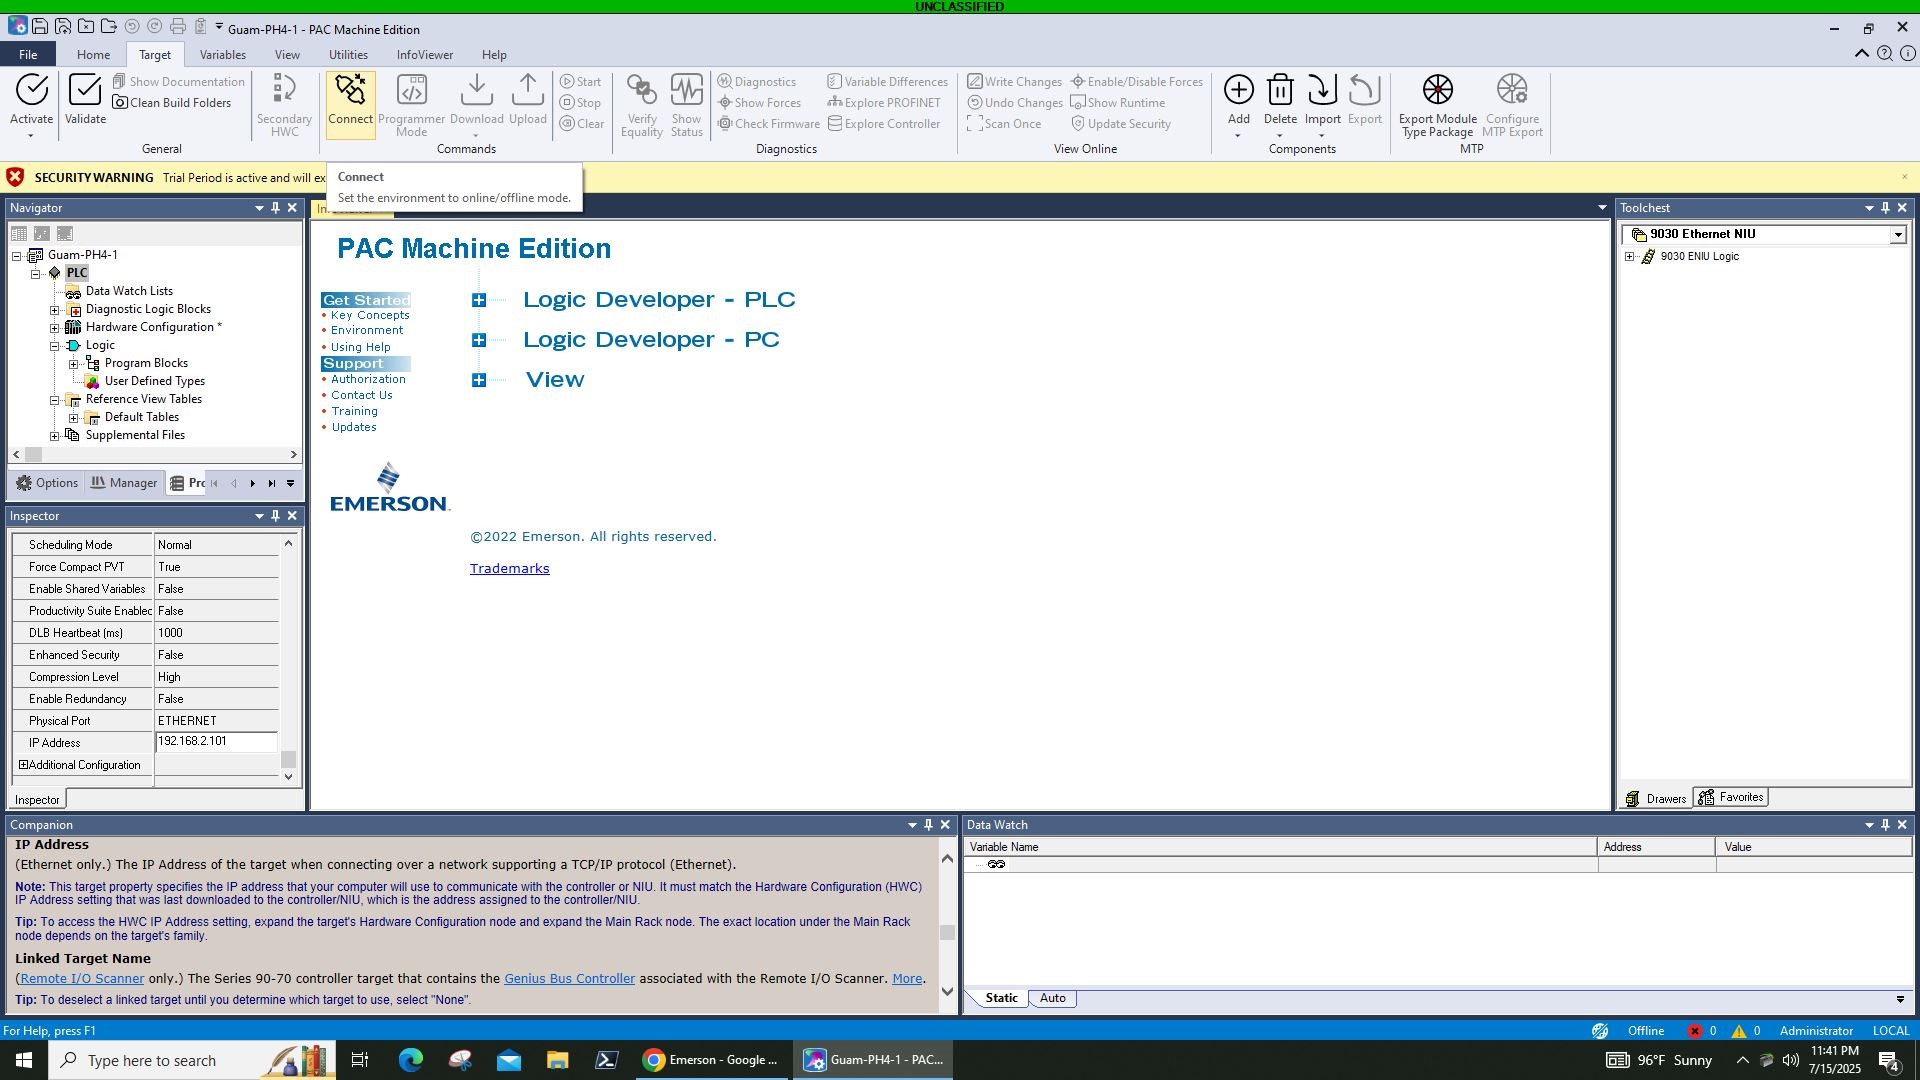
In the Inspector panel (usually on the bottom left), go down to IP Address.
Enter the IP address of the PLC you want to connect to (e.g., 192.168.0.100).
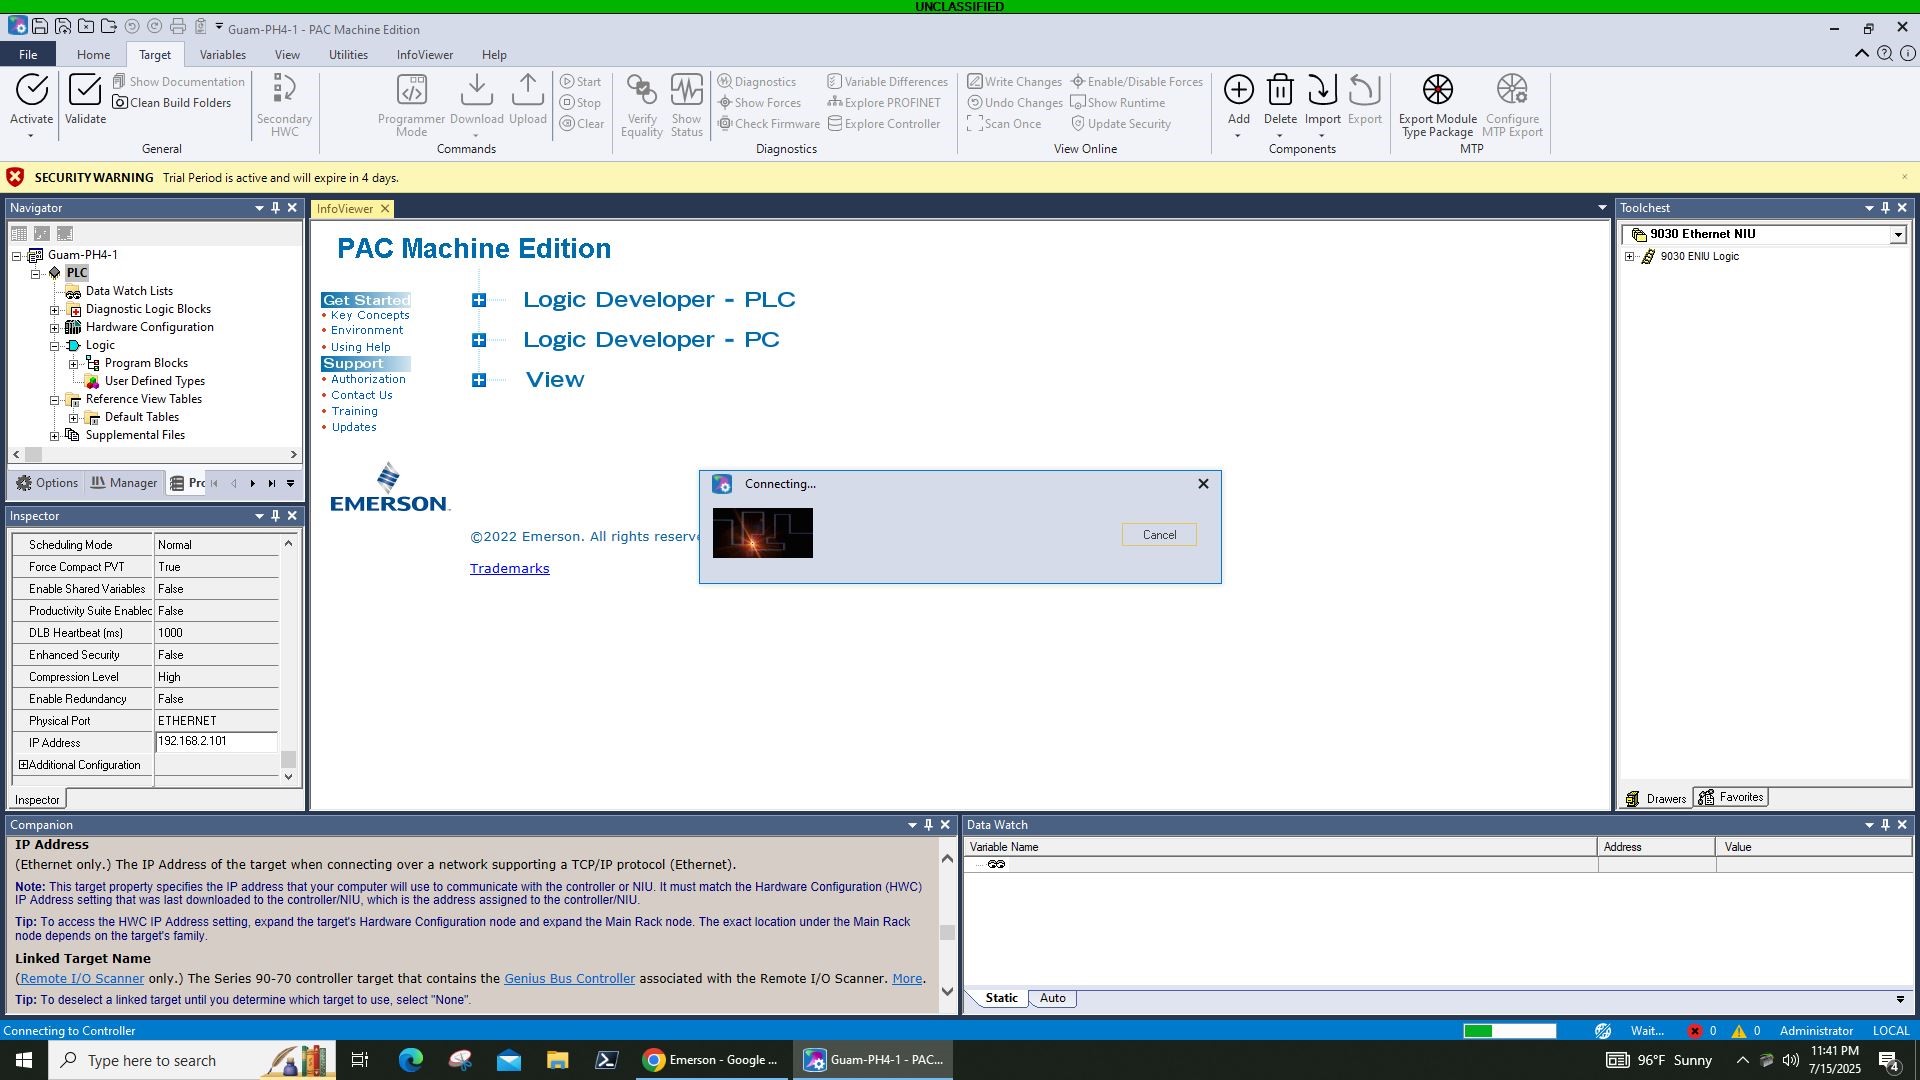
Connect to PLC: In the top menu, click on the Target tab. In the ribbon, click on Connect.
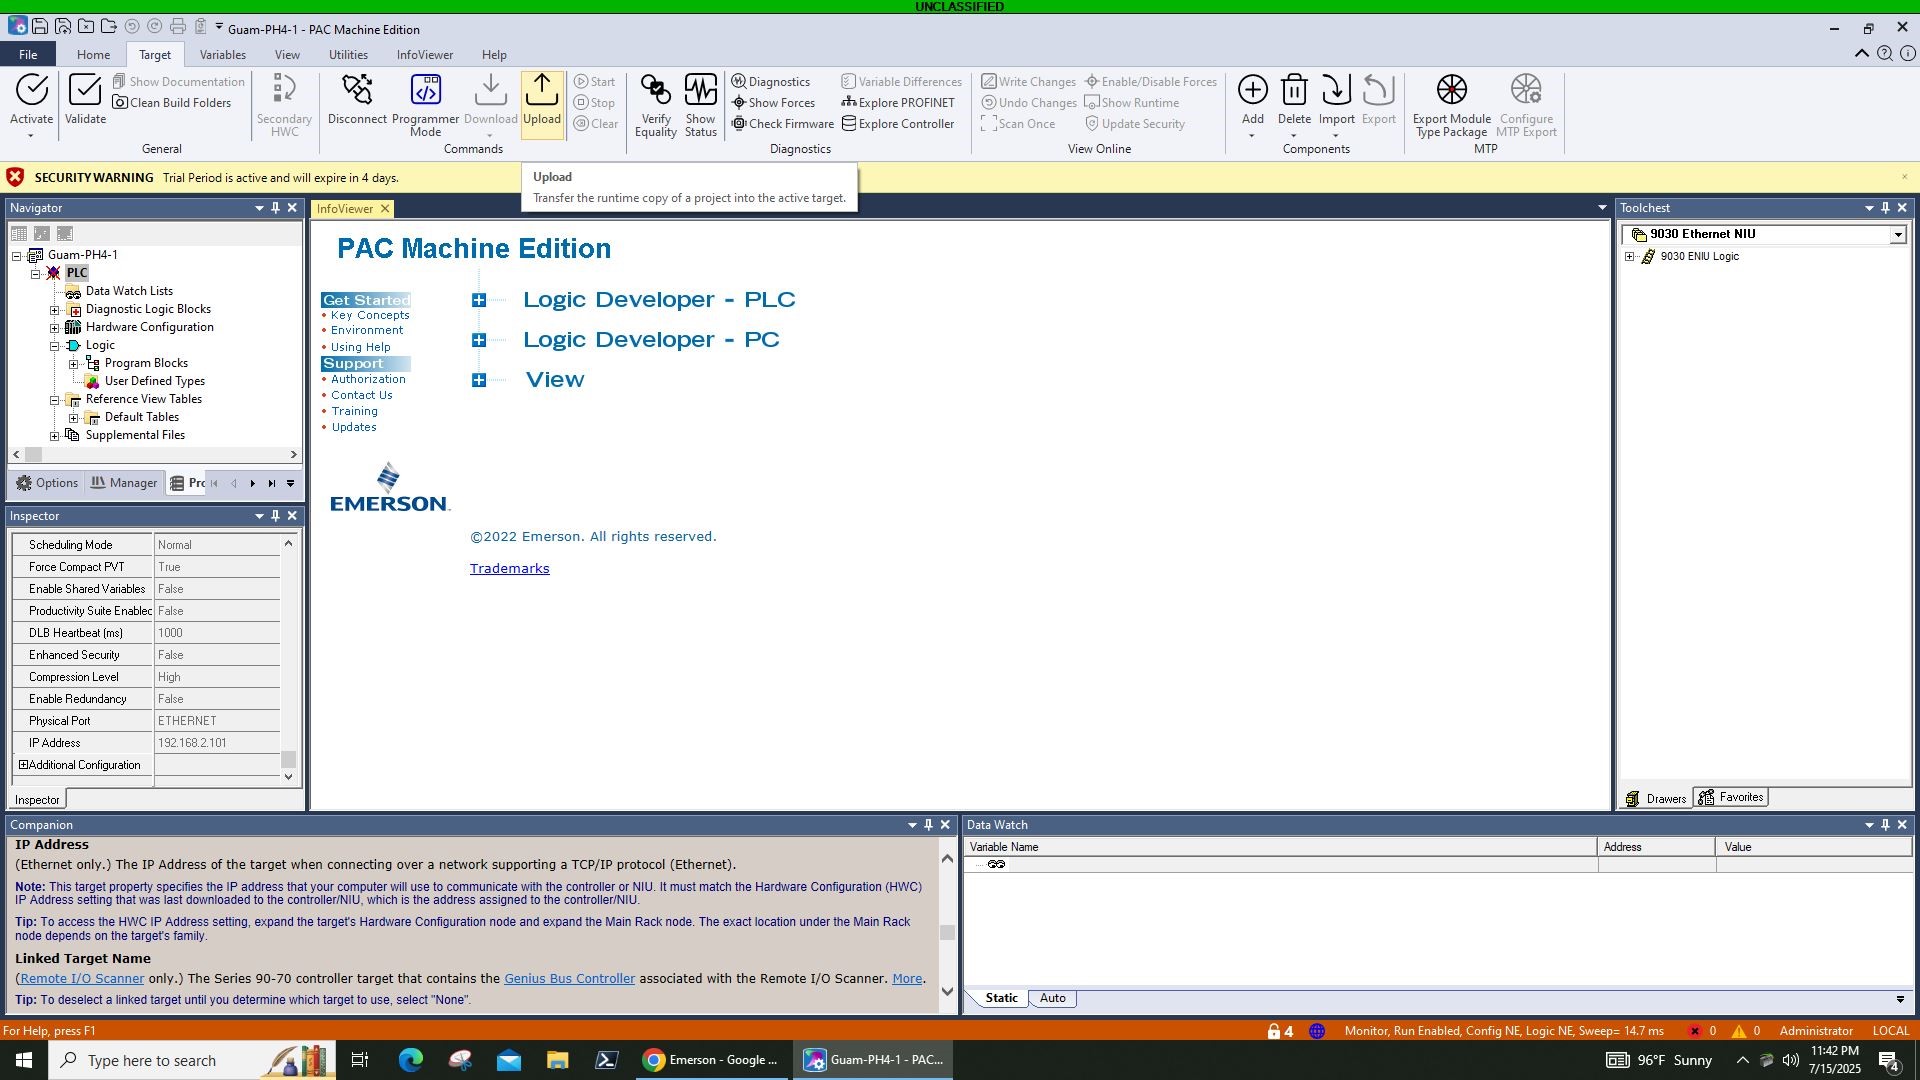
Monitor Connection: The software will attempt to connect to the PLC using the IP address you provided. Monitor the Feedback Zone at the bottom of the window to confirm a successful connection.
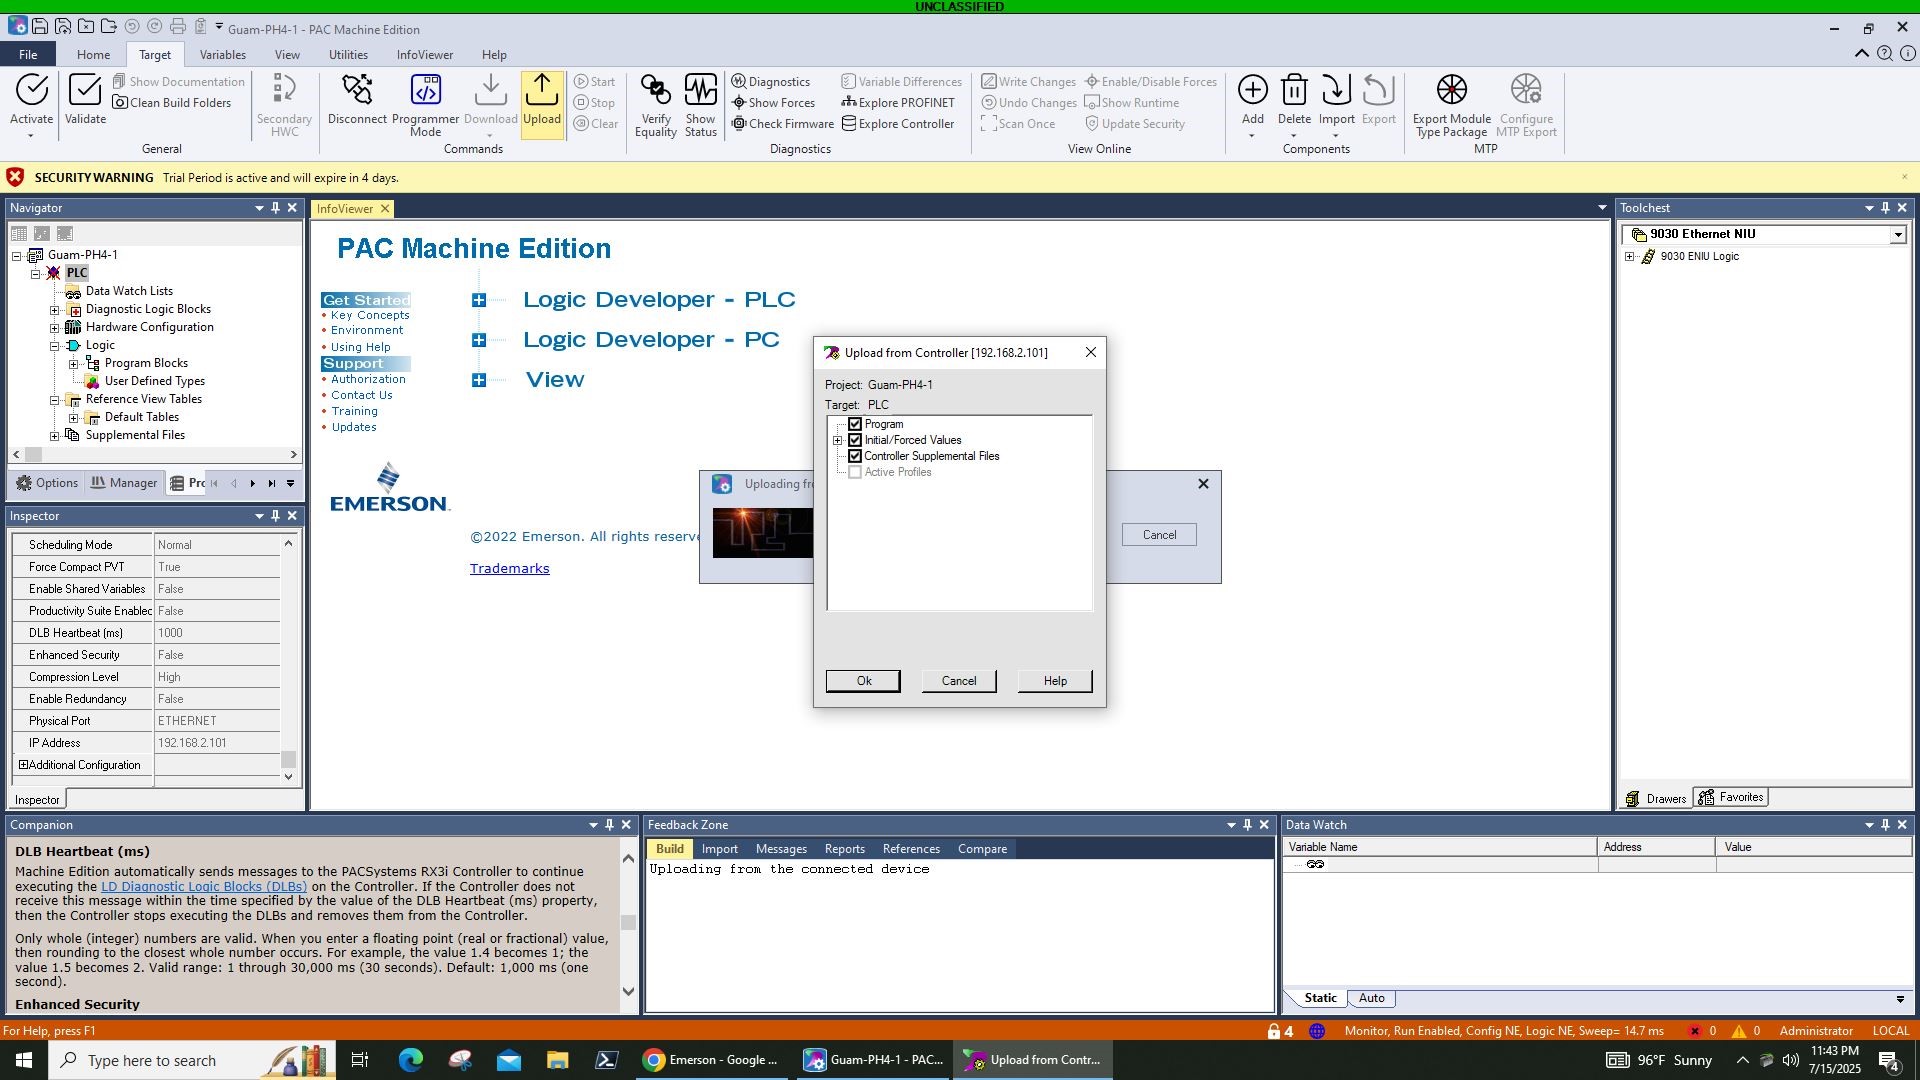
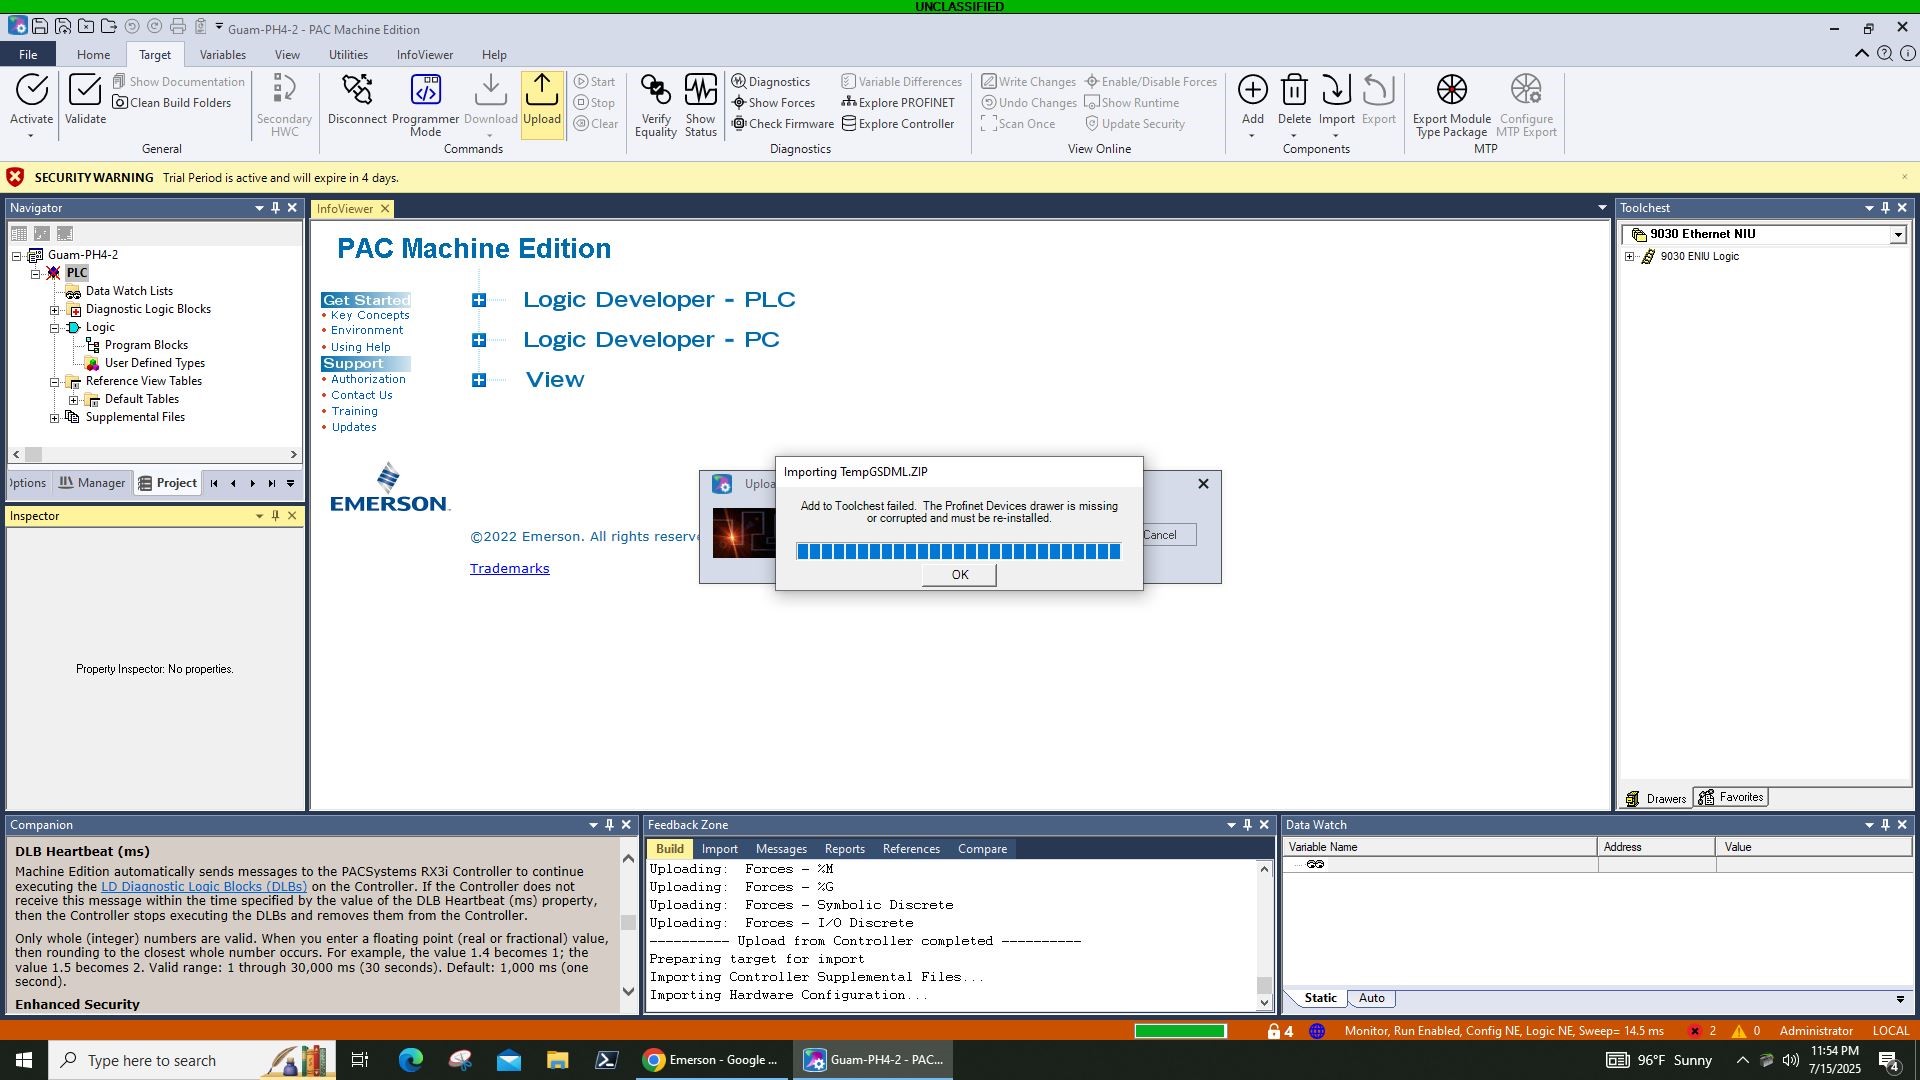
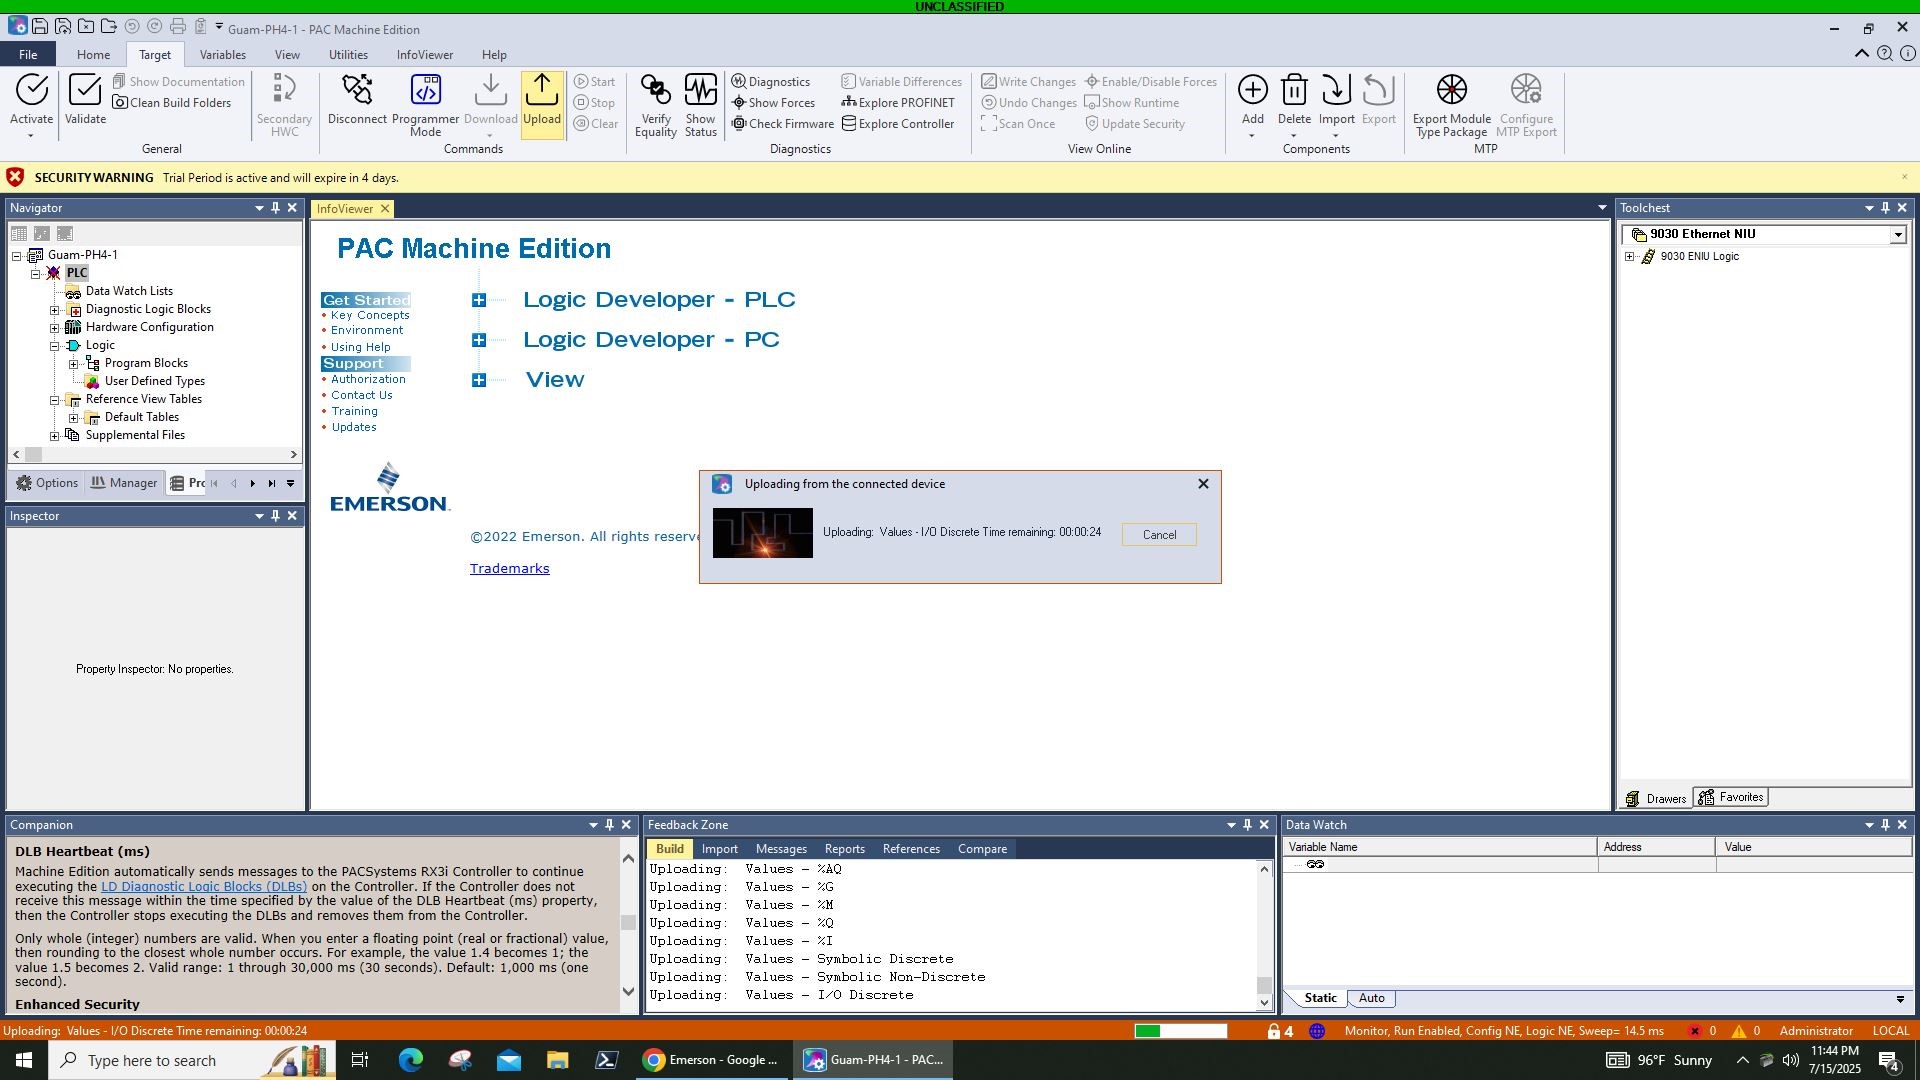
Initiate Upload: Once connected, click the Upload button (often found on thee ribbon under target).
Note: The term "Upload" in this context means transferring the data from the PLC to your computer.
Select Items for Upload: A pop-up window will appear, listing various items (e.g., Hardware Configuration, Program Blocks, Logic). Check all the items you wish to upload (pull) from the PLC to your computer.
Confirm Upload: Click OK. The software will then begin the import process.
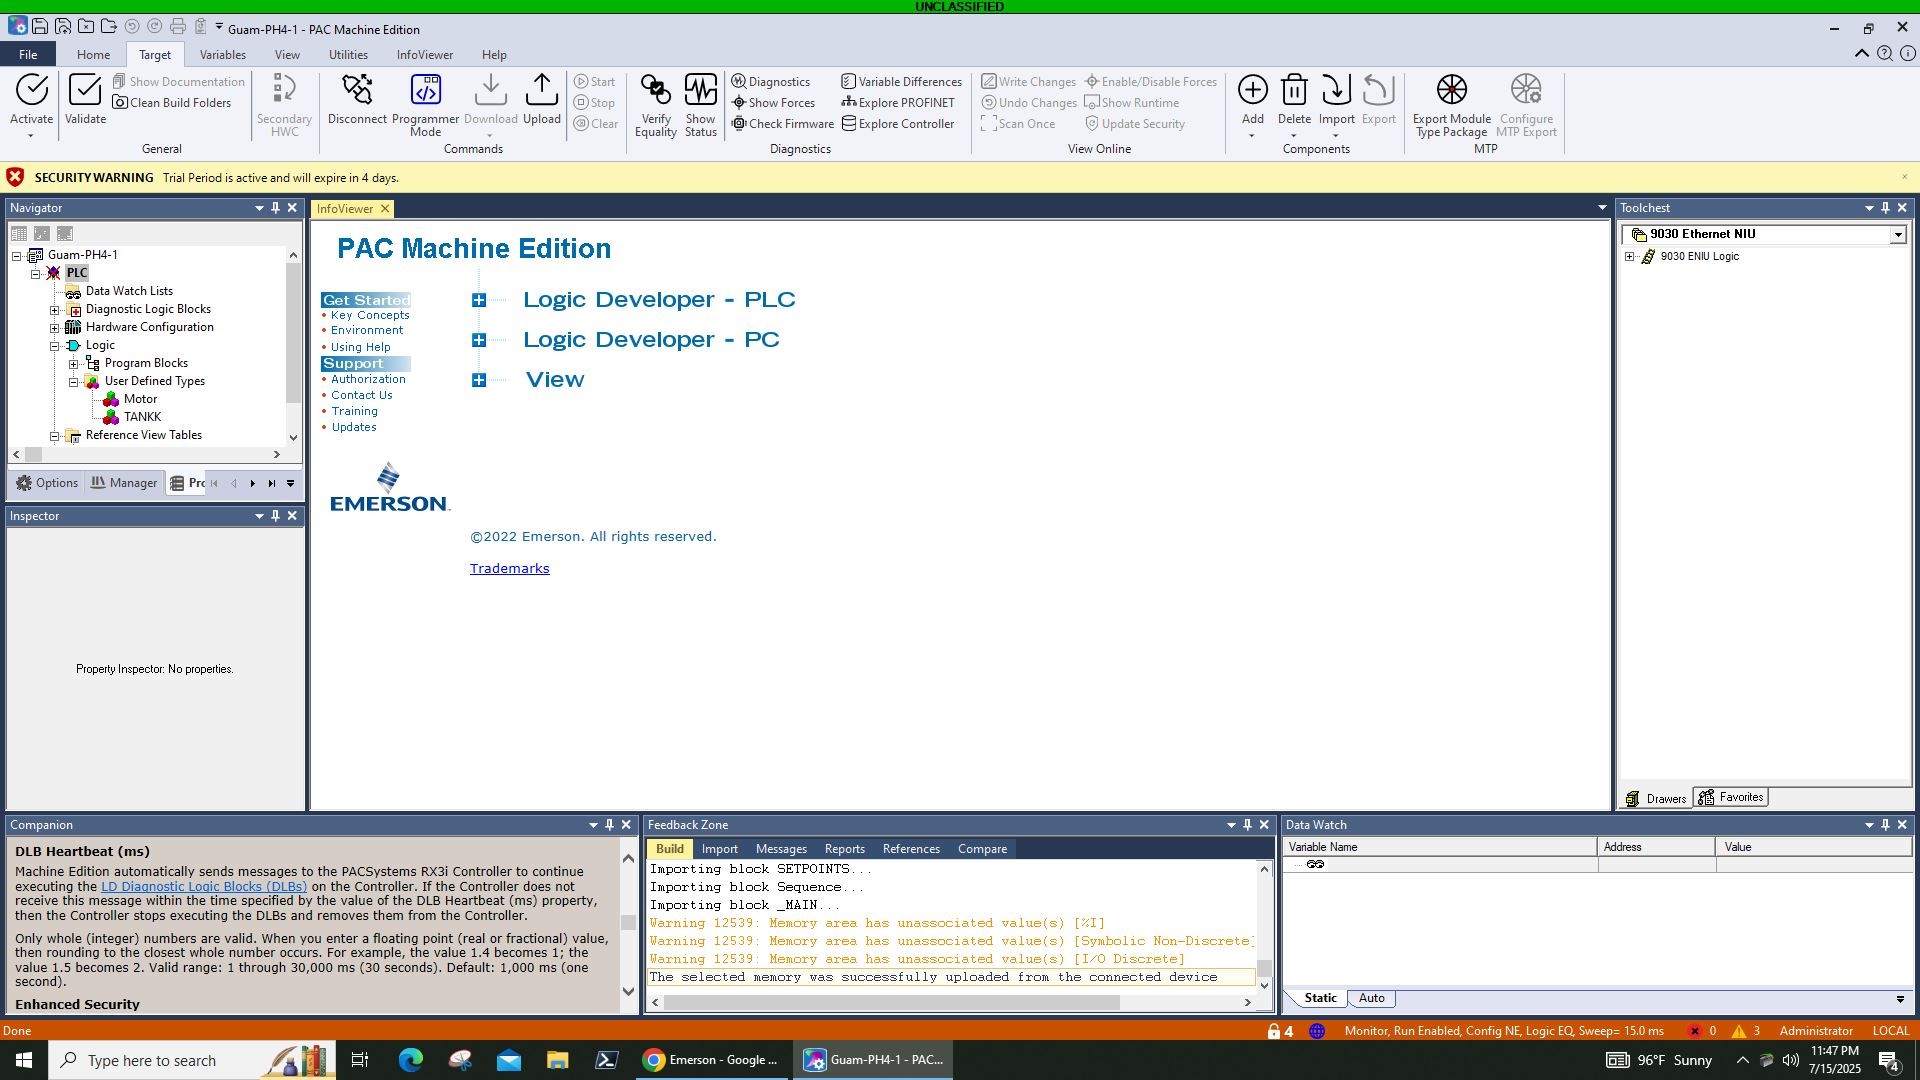
Verify Completion: In the Feedback Zone at the bottom, a message similar to "The selected memory was successfully uploaded from the connected devices" should appear when the upload is finished.